
How to Unlock the Full Potential of Your Oscillating Tool
An oscillating tool has many applications from plunge cuts to flush cuts to even caulk removal. Which is why it's also called a multi-tool—few tools are as versatile. We'll break down what makes the oscillating tool so indispensable, how to use it safely and effectively, and which projects it truly shines in. Here's how to get the most out of this tool.
The Oscillating Tool's Many Uses
The oscillating tool operates using a rapid back-and-forth motion in a tight arc—typically just a few degrees—which allows for precise control. This is why it's so great for many projects. It doesn't have a kickback like other power tools have. Here's a few ways to use this tool:
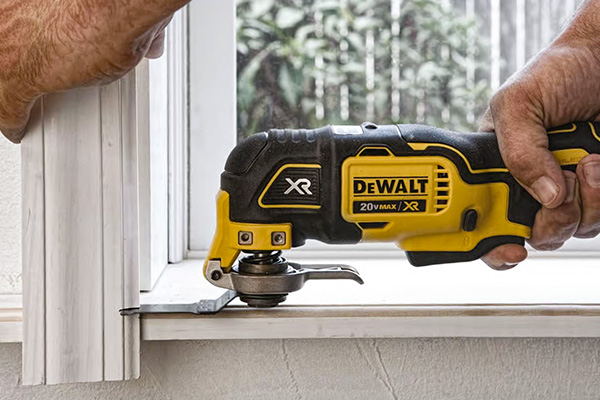
- For cutting, fine-toothed blades make plunge cuts in wood, plastic, metal, or drywall, making it perfect for jobs like installing electrical boxes or fitting in trim in tight spaces.
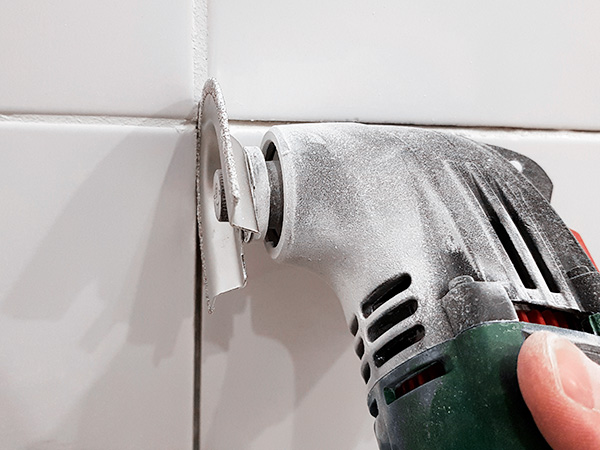
- With a scraping attachment, you can easily remove old grout, paint, or stubborn adhesive without damaging the surface underneath.
- Swap in a sanding pad, and you've got a compact sander capable of getting into tight corners and smoothing edges with ease.
Choosing the Right Attachments
Interchangeable blades are what makes this tool popular. However, when selecting blades or accessories, make sure they're compatible with your tool's mounting system—some use a universal fit, while others require brand-specific attachments. Standard kits usually come with some cutting blades, scrapers, and sanding pads, but the options don't stop there:
- Cutting Blades - These include different types for wood, metal, and plastic. These are perfect for trim removal, pipe cutting, and flush-cutting door jambs.
- Scraper Attachments - Essential for removing old caulk, adhesives, and stubborn paint without damaging underlying surfaces.
- Sanding Pads - Come in various grits from coarse to fine for sanding down rough edges.
- Grout Removal Blades - Specialized carbide-tipped attachments are thin enough to fit into grout lines and cut away grout.
- Plunge-Cut Blades - They help you create precise openings in drywall for electrical boxes and outlets.
- Flexible Scrapers - Perfect for removing window glazing and other scraping tasks.
- Segment Saw Blades - Allow for controlled curved cuts in various materials.
- Flush-Cut Blades - Designed for precision trimming of doorjambs and baseboards.


Safety and Other Tips
Here's how to stay safe and get the most out of your tool:
Personal Protection
- Eye Protection - Always wear safety glasses or goggles; flying debris is common with oscillating tools.
- Ear Protection - These tools produce high-frequency noise that can damage hearing over time.
- Dust Mask - Especially important when cutting drywall, sanding, or removing grout.
- Gloves - Consider cut-resistant gloves, but be careful they don't reduce your grip control.
5 Tips: How to Use an Oscillating Tool
- Know the Limits - Oscillating tools aren't meant for large cutting jobs or fine finishing work.
- Variable Speed - Start slow and increase speed as needed; lower speeds give more control.
- Let the Tool Work - Don't force the blade; let the tool do the cutting for you.
- Different Angles - Experiment with approach angles for better results and control.
- Guide Blocks - Use scrap wood as guides for straight cuts and greater precision.
Making the Classic Plunge Cut
Plunge cuts are what makes this tool so handy by letting you cut in the middle of a material such as a hole in drywall. Here are some tips on making good plunge cuts.
Get Started
- Choose the Right Blade - Use a plunge-cut blade appropriate for your material as described above.
- Mark Your Cut Line - Clearly mark where you need to cut.
- Secure the Material - Make sure your workpiece is secured. This can be done easily with clamps.
- Check Behind the Cut - Ensure there are no pipes, wires, or supports behind where you plan to cut. Oops!
- Set Your Depth - If your tool has an adjustable depth, set it to slightly deeper than your material.
Making the Plunge (Cut)
- Position the Tool - Hold the tool with the blade parallel to (flat against) the surface, with just the tip of the blade touching your starting point.
- Power Up - Turn on the tool and let it reach full speed before beginning the cut.
- Start the Plunge - Slowly tilt the blade, allowing the blade to gradually "bite" into the material at an angle.
- Complete the Plunge - Once the blade is fully perpendicular to the surface and has penetrated through, you can begin moving along your cut line.
- Control the Cut - With both hands on your tool, move slowly and steadily along your marked line. Don't force it to move fast.
Tips for Better Plunge Cuts
- Start at Lower Speed - Begin at a moderate speed for more control during the initial plunge.
- Shallow Angle - The more gradually you tilt the blade, the cleaner your entry point will be.
- Corner Technique - For rectangular cuts, make plunge cuts at each corner first, then connect them.
- Use a Guide - For straight cuts, clamp a straight edge to use as a guide.
Material-Specific Advice
- Drywall - Very easy to plunge cut; use minimal pressure.
- Wood - May require more time to complete the plunge.
- Plywood - Cut slowly to minimize tear-out of the veneer layers.
The oscillating tool is one of the most versatile to have in your toolbox as a DIYer or even a homeowner with lots of projects. Need help figuring out which blade your project needs? Stop by your local store where we're always happy to help.

Reviewed by Eddie Gurka
McCoy's In-House Expert
